Warning
Having at least three nodes in a cluster is highly recommended to avoid split-brain clusters. Although a two-node cluster is possible, it poses a risk of corrupt data if the system ever splits its brain. Split-brain clusters are undesirable in distributed computing environments because they can result in data inconsistency, corruption, and operational issues. Split brain occurs when the nodes in a cluster lose connectivity or communication with each other, leading to the cluster’s division into multiple isolated nodes. Each node thinks it is the active or primary cluster, resulting in the potential for conflicts and data discrepancies.
On each server, you will need to perform the following prep work:
- Create an XFS filesystem on the 100 GB LUN. This space will be used to store the Gluster data, known as bricks. In the context of Gluster, a brick refers to a basic storage unit within the storage cluster. A cluster is made up of multiple bricks, which are essentially directories on storage servers or devices where data is stored. Each brick represents a portion of the overall storage capacity of the cluster.
- Since we will be using Gluster to manage the storage, we will not be using LVM on the filesystem. On these systems, /dev/sdb is the 100 GB LUN. The following commands are used to create and mount the filesystem:
mkfs.xfs -f -i size=512 -L glusterfs /dev/sdb
mkdir -p /data/glusterfs/volumes/bricks
echo ‘LABEL=glusterfs /data/glusterfs/volumes/bricks xfs defaults 0 0’ |sudo tee -a /etc/fstab
mount -a
3. When completed, check with a df command to verify that the filesystem is mounted, as seen in the following example:

Figure 6.21 – Bricks mounted
4. Next, we need to make sure that all the nodes are in the /etc/hosts file. In this example, gluster1, gluster2, and gluster3 are in the file, using both the short name and the Fully Qualified Doman Name (FQDN). This is seen in the following code snippet:
[root@gluster3 ~]# more /etc/hosts
127.0.0.1 localhost localhost.localdomain localhost4 localhost4.localdomain4
::1 localhost localhost.localdomain localhost6 localhost6.localdomain6
192.168.200.110 gluster1.m57.local gluster1
192.168.200.125 gluster2.m57.local gluster2
[root@gluster3 ~]#
5. In order to install the software, we need to enable the Gluster repo. Then, the glusterfs and Gluster server software can be installed and started. This is done with the following commands:
dnf -y install oracle-gluster-release-el8
dnf -y config-manager –enable ol8_gluster_appstream ol8_baseos_latest ol8_appstream
dnf -y module enable glusterfs
dnf -y install @glusterfs/server
systemctl enable –now glusterd
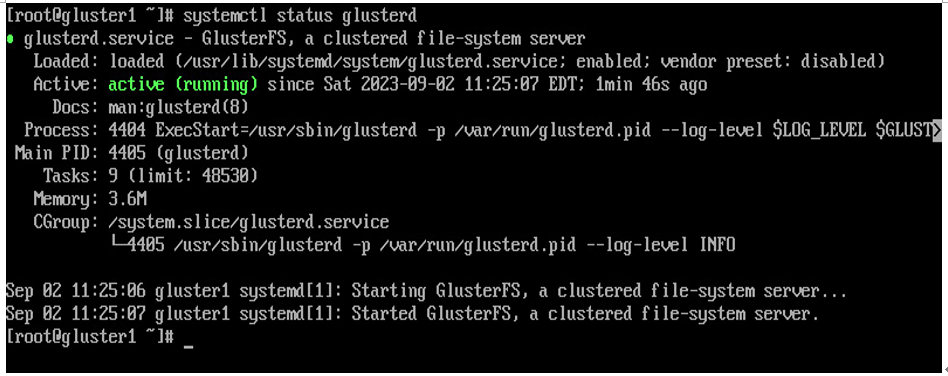
6. Once running, you can verify that the Gluster daemon is running with the systemctl status glusterd command. Verify that the service is active and running, as seen in the following example:

Figure 6.22 – Gluster daemon is running
7. Next, let’s configure the firewall to allow the glusterfs port with the following commands:
firewall-cmd –permanent –add-service=glusterfs
firewall-cmd –reload
8. Additionally, to improve security, let’s create a self-signed key, to encrypt the communication between the nodes:
openssl genrsa -out /etc/ssl/glusterfs.key 2048
openssl req -new -x509 -days 365 -key /etc/ssl/glusterfs.key -out /etc/ssl/glusterfs.pem
When generating the .pem file, since this is a self-signed certificate, you will need to enter your contact info into the certificate; however, it will work with the defaults!
Note
In this example, we are using a self-signed certificate. In a secure production environment, you will want to consider using a commercially signed certificate.
We will use these files later to encrypt the communication.
