Using the DNF time machine
DNF has a time machine built into it! This isn’t just a way to look back through the cosmos; it actually allows you to see the history of what was installed and also allows you to roll back a single change, or all changes up to a point.
Getting ready
To do this, you will need a test system, running Oracle Linux 8, with access to an RPM repo.
How to do it…
When DNF installs software, it keeps a history of all the actions performed. This includes upgrades to the software, installed software, and removal of the software. The dnf history command shows this history:
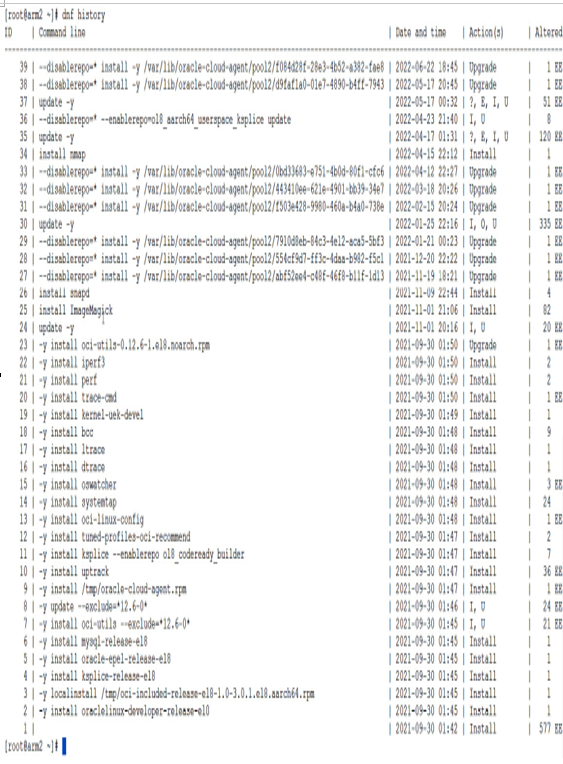
Figure 5.3 – The dnf history command
There are five columns – ID, Command line, Date and time, Action(s), and Altered:
- ID: This is the identifier for the history, and is used in commands that will show info, roll back, undo, or store a transaction
- Command line: This is the option passed to DNF when the command was run that added to the transaction history
- Date and time: This is the timestamp of when the transaction was run
- Action(s): This is what actions were taken; multiple actions can performed in the same transaction:
- (D) Downgrade: A package was downgraded
- (E) Erase: A package was removed
- (I) Installed: A package was installed
- (R) Reinstall: A package was reinstalled
- (O) Obsoleting: A package was flagged as obsolete
- (U) Update: A package was updated
- Altered: This is the number of packages altered when the command was run, in addition to several exception flags:
- E/EE: The transaction was completed but had an output generated. Not all outputs are errors!
- P: The transaction was completed but problems exist in the rpm database.
- s: The transaction was completed but since the –skip-broken parameter was enabled, some packages were skipped.
- >: The rpm database was changed outside of DNF after the transaction ran.
- <: The rpm database was changed outside of DNF before the transaction ran.
- *: The transaction was aborted before completion.
- #: The transaction was completed but returned a non-zero status.
When there are error codes, you can see the details with the dnf history info {ID} command, as seen in Figure 5.4:
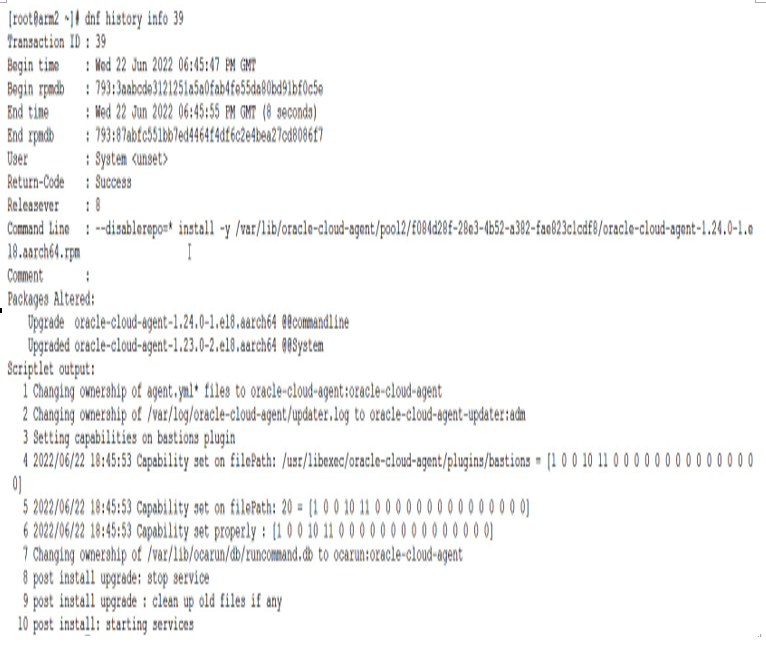
Figure 5.4 – The dnf history info command
In this example, the output is more informational, with no actual errors. This is not uncommon.
You can also use dnf history to uninstall a package. There are two ways to do this: rollback or undo. A rollback command attempts to reverse out all of the DNF transactions from the current point to the transaction ID specified. An undo command simply undoes the transactions in the ID identified.
On the test system, let’s undo the installation of Nmap from 4/17/2022, which was ID 34, using the dnf history undo 34 command:
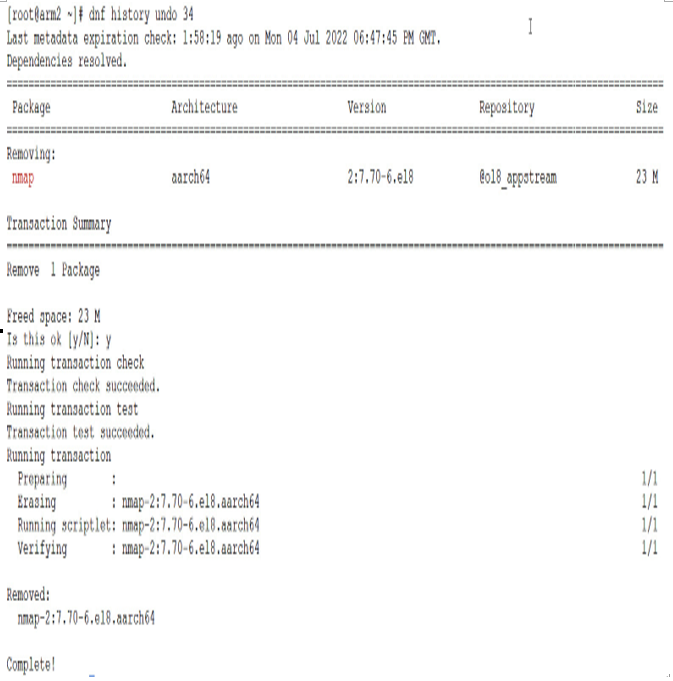
Figure 5.5 – The dnf history undo command
This was a fairly simple undo, with Nmap being uninstalled. When the DNF history is looked at after the transaction, you will see a new ID of 40, showing the undo command:
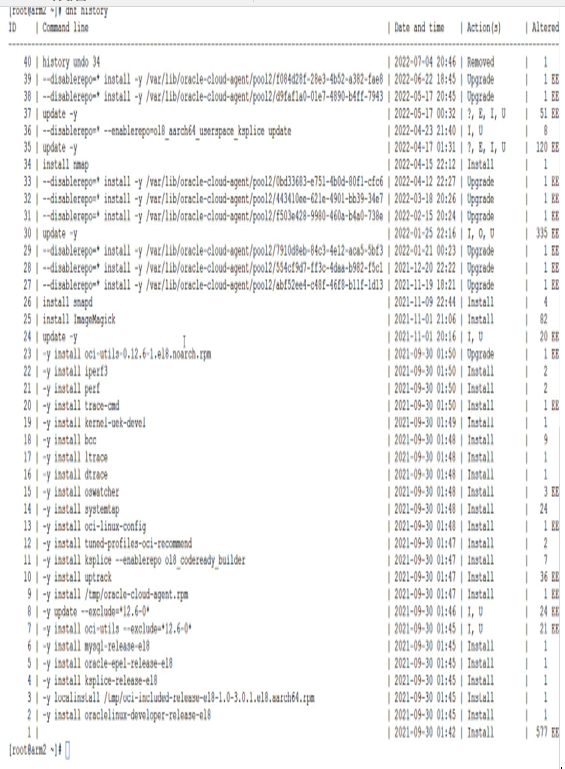
Figure 5.6 – DNF history after the undo
Now, if the goal was to roll back all of the changes, let’s say to ID 37, the command would be dnf history rollback 37. This will roll back the system to match the state it was in when transaction 37 was completed.
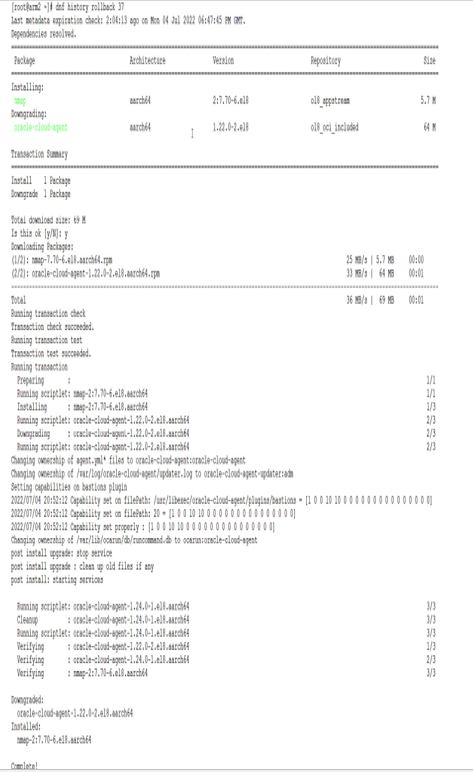
Figure 5.7 – DNF rollback
The rollback command rolls back the transitions, so Nmap is actually reinstalled, and the oracle-cloud-agent RPM is downgraded. This is reflected in the new history summary as ID 41 (shown in the following screenshot) where we see the install and downgrade actions in ID 41:

Figure 5.8 – DNF history post rollback
Note
While the rollback and undo commands often work well, it is still good practice to keep OS snapshots using hypervisor or cloud-native tooling. You can also take snapshots using Btrfs. Sometimes, the rollback scripts in the RPMs do not undo all the changes to the system. When leveraging a storage-based snapshot, you reduce the risk of having issues due to this.
The DNF system maintains a database of all transactions, with the dnf history command and its options giving you access to the database to examine what happened, as well as the ability to undo a single transaction or roll back from the latest transaction to a specific ID in the history. This is a very helpful tool for admins when they need to back out of patches and software installation.
